
The simplest effective cedar shake maintenance program combines a yearly inspection, routine debris and gutter control, and targeted moss removal, following guidance from the Cedar Shake & Shingle Bureau, USDA Forest Products Laboratory, and Oregon State University extension research. Inspect your roof at least once a year, ideally in spring, and again after major storms. Clean gutters twice a year, treat moss as soon as you spot it, and skip the pressure washer. Call a professional for anything above a single story or beyond a patch repair.
TL;DR:
- Check the roof in spring and after major storms, including flashing, valleys, attic moisture, and missing, split, or lifted shakes.
- For light debris, use a garden hose and soft brush; oxygen bleach must follow its label, while high pressure can strip wood fibers.
- Do not seal cedar shakes; choose only products labeled for cedar roofing, and avoid retreating factory treated shakes without manufacturer approval.
- Apply treatments to a fully dry roof with at least 24 to 48 dry hours forecast before and after; they last 1 to 3 years.
- Call a professional for work above one story, heavy moss, active leaks, sagging, or widespread decay; handle only a single cracked shake yourself.
Table of Contents
- Your seasonal cedar shake checklist
- How to clean and remove moss without damaging the wood
- What to put on your roof, and what to avoid entirely
- Inspection points and the repairs you can safely handle yourself
- A step-by-step cleaning routine with the right tools on hand
- Applying water repellents and preservatives the right way
- What we see go wrong most often
- Let our team handle the parts of the job that carry risk
- FAQ
- Sources
Your seasonal cedar shake checklist
Cedar shakes respond well to small, consistent care rather than big once-in-a-while projects. Spreading tasks across the year catches problems early and keeps you off a ladder more than necessary.
Spring
- Inspect the whole roof for winter damage: cracked, cupped, or missing shakes.
- Clear leaves, needles, and seed pods from the surface and valleys.
- Clean gutters and downspouts so water drains away from the shakes.
- Check the attic for moisture stains, mold smell, or daylight gaps that signal poor ventilation.
Summer
- Trim back any branches that shade or touch the roof.
- Walk the perimeter and spot-check shaded, north-facing sections for early moss or algae growth.
- Confirm attic vents are clear of debris and insect nests.
Fall
- Remove fallen leaves and pine needles before they mat down and trap moisture.
- Clear downspouts and valley drainage ahead of winter precipitation.
After any major storm: check for missing, split, or displaced shakes and inspect flashing around chimneys, vents, and valleys. Our moss removal guide covers the warning signs worth photographing before you call anyone for repairs.
How to clean and remove moss without damaging the wood
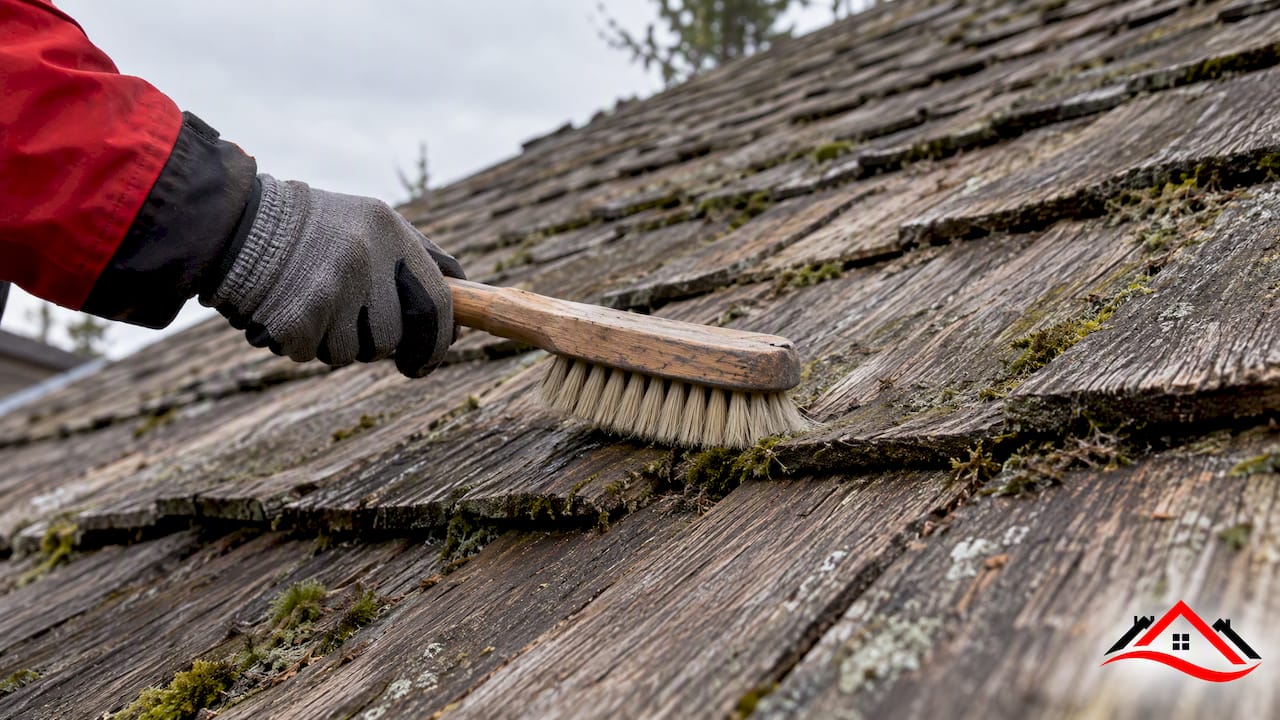
A garden hose and a soft bristle brush handle most light debris and surface grime. Save anything involving ladders, steep pitches, or heavy moss for a professional with low-pressure equipment rated for wood roofs.
- Rinse the roof from the top down with a garden hose to loosen loose debris first.
- Mix oxygen bleach (sodium percarbonate) according to the product label, never a chlorine bleach solution, which is harsher on wood fiber.
- Apply the mixture and let it sit for the contact time listed on the label, usually 10 to 20 minutes, so it can break down moss and algae.
- Rinse down-slope, following the natural water flow, using the lowest effective pressure.
- For stubborn moss clumps, scrape gently by hand or use a soft brush rather than a metal tool that can gouge the surface.
- Consider zinc or copper strips installed at the ridge, which release trace ions that limit moss regrowth on the courses below, according to CSSB’s care and maintenance brochure.
Wear eye protection and gloves when working with oxygen bleach, and keep runoff away from garden beds and storm drains where it can affect plants.
High-pressure washing is where most do-it-yourself cleaning jobs go wrong. The Oregon State University extension guide notes that excessive pressure or an incorrect spray angle can strip wood fibers, leaving shakes more porous and vulnerable to moisture. If a power wash has already happened, have a professional re-treat the surface with an appropriate water repellent afterward.
Pro Tip: Test any cleaning solution on a small, hidden section of roof first and wait a full day to see how the wood reacts before treating the whole surface.
What to put on your roof, and what to avoid entirely
Cedar shakes do not need to be sealed, and sealing them is one of the most common mistakes homeowners make. The Cedar Shake & Shingle Bureau specifically advises against sealants, since they trap moisture inside the wood rather than letting it breathe and dry.
What actually helps:
- Water repellents (WRs/WRPs) with UV inhibitors slow weathering and reduce cupping.
- Preservatives like copper naphthenate protect against decay and are labeled specifically for cedar roofing.
- Factory pressure-treated shakes (such as Certi-Last or Certi-Guard products) already carry long-term protection and should not be treated again without the manufacturer’s approval.
Surface treatments on cedar roofs commonly last 1 to 3 years, and they perform noticeably better when applied to newer wood rather than shakes that are already heavily weathered.
Only use products labeled explicitly for cedar roofing, and check the safety data sheet before buying anything. Unfortified linseed oil, diesel, and crank-case oil show up in older advice and online forums, but none of them are appropriate: they can feed fungal growth instead of preventing it. Oiling treatments sometimes make sense in dry climates, but in humid regions they tend to trap moisture and accelerate rot rather than stop it.
Inspection points and the repairs you can safely handle yourself
A thorough inspection takes less than an hour and tells you most of what you need to know about your roof’s condition. Walk the roof line from the ground with binoculars, or have someone experienced check it up close.
- Look at flashing around chimneys, pipe boots, and valleys for gaps or rust.
- Check butt ends of shakes for splitting, cupping, or soft spots.
- Scan for curling or lifted shakes that expose the underlayment.
- Confirm attic ventilation is unobstructed and look for moisture staining on the underside of the roof deck.
Homeowners can often replace a single cracked shake or gently shim a minor split themselves, following the step-by-step process in our shingle inspection guide. Avoid relying on caulk as a long-term fix: it is a temporary patch, not a repair.
Call a professional when you see widespread decay, active leaks, heavy moss or lichen coverage, visible sagging, or any section of roof you cannot access safely. These are signs that routine maintenance has run its course, and our roof replacement guide walks through what comes next.
A step-by-step cleaning routine with the right tools on hand
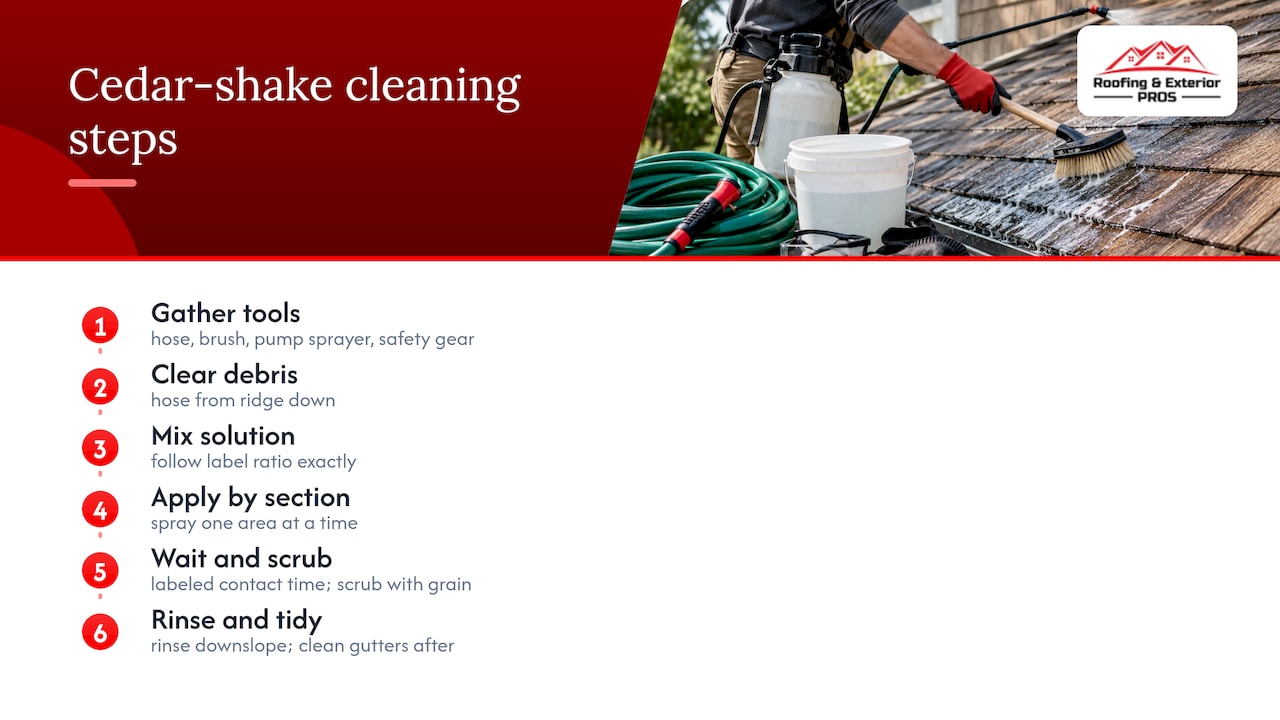
Having the right materials ready before you start saves time and reduces the chance of damaging the wood. Gather a garden hose with an adjustable nozzle, a long-handled soft bristle brush, oxygen bleach, a pump sprayer, safety glasses, non-slip footwear, and a stable ladder with roof hooks if you plan to walk the surface.
Start by clearing loose debris with the hose, working from the ridge down. Mix the oxygen bleach solution in the pump sprayer at the ratio printed on the label, since stronger is not better and can bleach or weaken the wood. Apply evenly across one section at a time rather than the whole roof at once, so the solution does not dry before you can brush and rinse it.
Let the solution sit for the labeled contact time, then scrub gently in the direction of the wood grain. Rinse thoroughly down-slope with the garden hose, checking that no residue pools in valleys or against flashing. Clean gutters immediately afterward, since moss and debris washed down during cleaning tend to collect there. Our gutter cleaning guide covers safe technique for that step.
Work on a dry, overcast day if possible. Direct sun can cause the cleaning solution to evaporate before it finishes working, and wet shakes underfoot are a real fall hazard.
Applying water repellents and preservatives the right way
Timing and weather matter as much as the product itself. Apply treatments only after the roof has dried completely from cleaning, ideally with at least 24 to 48 hours of dry weather in the forecast before and after application.
Read the label fully before opening the container. Water repellents and preservatives labeled for cedar roofing list specific coverage rates, application methods, and reapplication intervals, and going outside those instructions can void any warranty tied to the product. Use a pump sprayer or soft applicator for even coverage, working from the top of the roof down so you are not standing on wet, treated wood.
Apply in thin, even coats rather than one heavy application. A second light coat after the first has soaked in usually outperforms a single saturated pass, and it avoids the pooling that leads to uneven weathering later.
Keep pets and people off the roof and out of runoff areas during application, since preservatives like copper naphthenate are registered pesticides and need to be handled accordingly. Store leftover product according to the safety data sheet, away from heat and out of reach of children.
Skip treatment altogether on factory pressure-treated shakes unless the manufacturer specifically approves it, since an aftermarket product can interfere with the existing protection rather than add to it.
What we see go wrong most often
The most common mistake we run into is a homeowner hiring whoever shows up with a pressure washer and a bottle of generic sealant, without checking references or asking what product is actually labeled for cedar. The Cedar Shake & Shingle Bureau warns about exactly this kind of unvetted contractor, and we see the damage from it regularly: stripped wood fiber, sealed-in moisture, and roofs that age faster than they should.
Neglected gutters and overgrown branches cause a surprising share of the moss and rot problems we get called out for. A little consistent upkeep costs far less than premature replacement.
— Jake Ehlinger
Let our team handle the parts of the job that carry risk
We understand that climbing onto a steep cedar roof with a ladder and a sprayer is not how most homeowners want to spend a Saturday, and some of this work genuinely calls for a professional set of hands. Our crews inspect, clean, and treat cedar shake roofs, and we handle the moss removal, preservative application, and small repairs that keep a roof performing the way it should.

- Full roof inspections that catch flashing issues, split shakes, and ventilation problems before they become leaks.
- Safe cleaning and moss treatment using low-pressure methods and products labeled for cedar.
- Storm damage response when wind or hail has done more than routine maintenance can fix.
If your roof needs more than a weekend project, or if branches near the roofline need a careful hand (our partners at Arbcare specialize in sectional tree removal for tight spaces, a useful reference if you are dealing with a large overhanging tree), reach out and we will take a look. Visit our roofing services page to schedule an inspection or get a quote on repairs.
FAQ
What is the major disadvantage of cedar shakes?
Cedar shakes require more upkeep than many other roofing materials, including regular cleaning, moss control, and periodic treatment to prevent decay. Without that maintenance, they are prone to splitting, cupping, and fungal growth in damp climates.
What is the average lifespan of a cedar shake roof?
A well-installed, properly maintained cedar shake roof can last 25 to 30 years or more, according to USDA Forest Products Laboratory and industry sources. Maintenance has a direct effect on how long a roof actually reaches that range.
Should you seal cedar shakes?
No. The Cedar Shake & Shingle Bureau advises against sealing cedar roofs, since sealants trap moisture in the wood instead of letting it dry out naturally. Water repellents and EPA-registered preservatives labeled for cedar roofing are the recommended alternative.
Can you power wash cedar shake siding?
Power washing is risky for cedar shakes and shingles because excessive pressure can strip wood fiber and shorten the material’s lifespan. A soft wash with a garden hose and oxygen bleach solution, or a professional low-pressure cleaning, is the safer route for both roofing and siding.
Sources
- Cedar Maintenance FAQ – Cedar Shake & Shingle Bureau
- The Care and Maintenance of Wood Shingle and Shake Roofs (PNW 733)
- Installation, care, and maintenance of wood shake and shingle roofs | US Forest Service Research and Development